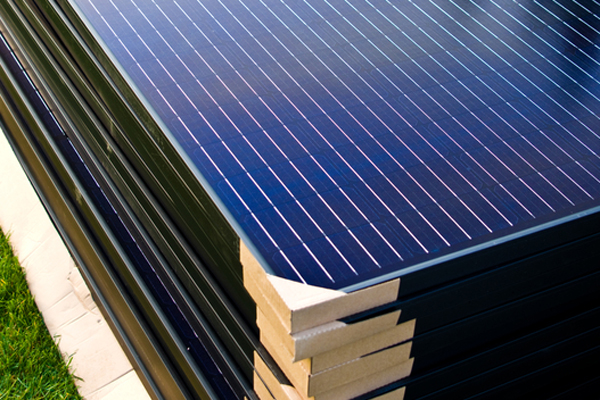
In the world of renewable energy, solar power stands out as one of the most promising solutions for a sustainable future. Solar panels, with their ability to convert sunlight into electricity, have gained widespread attention. Yet, for many, the intricacies of solar panel energy production remain shrouded in mystery. Fear not, for in this article, we’ll delve into the realm of solar energy output, decoding the complexities into words anyone can grasp.

Understanding Solar Panel Basics

Before we dive into energy production, let’s grasp the fundamentals. Solar panels consist of photovoltaic cells, which generate electricity when exposed to sunlight. This electricity is then either used immediately or stored in batteries for later use.

Factors Affecting Solar Panel Output

Several factors influence how much energy a solar panel can produce:

  1. Sunlight Intensity: The intensity of sunlight directly impacts energy production. Bright, sunny days result in higher output compared to cloudy or overcast conditions.
  2. Panel Orientation and Tilt: The angle and direction at which solar panels are installed affect their efficiency. Panels facing south and tilted at an angle matching the latitude of the location receive optimal sunlight exposure.
  3. Shading: Shade from trees, buildings, or other obstructions can significantly reduce solar panel output. Even partial shading on a panel can diminish its performance.
  4. Temperature: Surprisingly, solar panels are more efficient in cooler temperatures. High temperatures can cause a decrease in efficiency, albeit minor.

Calculating Solar Panel Output

Now, let’s demystify the calculation of solar panel output. The unit of measurement for solar energy is kilowatt-hours (kWh). It represents the amount of energy produced by a solar panel over one hour of full sunlight.

To estimate the energy production of a solar panel system, you can use the following formula:

[ \text{Energy (kWh)} = \text{Power (kW)} \times \text{Sunlight Hours} ]

Where:

  • Power (kW) is the capacity of the solar panel system in kilowatts.
  • Sunlight Hours represents the average number of hours of sunlight received per day.

Real-World Example

Let’s put theory into practice with an example. Suppose you have a 5 kW solar panel system installed on your rooftop. On average, your location receives 5 hours of sunlight per day.

[ \text{Energy (kWh)} = 5 \, \text{kW} \times 5 \, \text{hours/day} = 25 \, \text{kWh/day} ]

Thus, your solar panel system would produce approximately 25 kWh of energy per day.

Understanding Energy Needs

Understanding your energy needs is crucial in determining the size of the solar panel system required. Factors such as household electricity consumption, peak usage times, and the availability of net metering should be considered.

Conclusion

Solar panel energy production, though complex in its technicalities, can be understood with the right knowledge. By considering factors like sunlight intensity, panel orientation, and shading, along with basic calculations, anyone can grasp the basics of solar energy output. As the world shifts towards sustainable energy solutions, demystifying solar power becomes ever more essential. So, embrace the sun, harness its power, and illuminate your world with clean, renewable energy.

Off Grid Cabins and Sheds

Live Off the Grid with Complete Power System Solutions

Dreaming of escaping the hustle and bustle of city life and living a simpler, more self-sufficient existence? Off-grid living offers the chance to reconnect with nature, reduce your reliance on fossil fuels, and enjoy the peace of mind that comes with generating your own power.

But where do you start? One of the most crucial aspects of off-grid living is a complete off-grid power system. This system will provide you with the clean, sustainable energy you need to power your lights, appliances, and electronics.

Types of Off-Grid Power Systems

There are two main types of off-grid power systems:

  • Solar-powered systems: These systems use solar panels to convert sunlight into electricity. They are the most popular option for off-grid living, as they are relatively affordable, reliable, and require minimal maintenance.
  • Wind-powered systems: These systems use wind turbines to generate electricity. They are a good option for areas with strong, consistent winds, but they can be more expensive and require more maintenance than solar systems.

Choosing the Right System for You

The best off-grid power system for you will depend on a number of factors, including your energy needs, budget, and location.

Small Off-Grid Solar Systems

For small cabins or sheds, a small off-grid solar system may be sufficient. These systems typically include one or two solar panels, a battery, and an inverter. They can provide enough power for basic needs, such as lighting, refrigeration, and water pumping.

Solar Panel Kits for Cabins and Sheds

Many companies sell pre-packaged solar panel kits for cabins and sheds. These kits include all of the components you need to get started, making them a great option for DIYers.

Things to Consider When Choosing an Off-Grid Power System

  • Your energy needs: How much electricity do you typically use in a day? Make sure your system is sized to meet your needs.
  • Your budget: Off-grid power systems can range in price from a few thousand dollars to tens of thousands of dollars.
  • Your location: The amount of sunlight and wind in your area will affect the size and type of system you need.
  • Your DIY skills: If you are handy, you can save money by installing your own system. However, if you are not comfortable working with electrical systems, it is best to hire a professional.

Living off the grid can be a rewarding experience, but it is important to do your research and choose the right power system for your needs. With careful planning, you can create a sustainable and self-sufficient lifestyle that is both comfortable and enjoyable.

Additional Tips for Off-Grid Living

  • Conserve energy: The less energy you use, the smaller and cheaper your off-grid power system will be.
  • Use energy-efficient appliances: Look for appliances with the Energy Star label.
  • Store food properly: Invest in a good quality refrigerator or freezer to keep your food fresh.
  • Be prepared for emergencies: Have a backup plan in case your power system fails.

I hope this blog post has helped you learn more about complete off-grid power systems. If you are considering making the switch to off-grid living, I encourage you to do your research and find the system that is right for you.

Happy off-gridding!

DIY Solar Kits and Blue Pacific Solar

  1. Cost Savings: One of the major benefits of installing a Blue Pacific Solar Kit for your DIY project is the potential for significant cost savings. By harnessing solar energy, you can reduce or even eliminate your reliance on traditional electricity sources, resulting in lower utility bills over time. Solar power is a renewable energy source, so you won’t have to worry about rising fuel costs or price fluctuations.
  2. Environmental Friendliness: Solar power is a clean and sustainable energy source. By installing a Blue Pacific Solar Kit, you’re taking a proactive step towards reducing your carbon footprint and contributing to a greener future. Solar energy produces no greenhouse gas emissions or air pollutants, helping to combat climate change and improve air quality.
  3. Energy Independence: Solar power provides you with a level of energy independence. By generating your own electricity, you’re less reliant on the grid and are better prepared for power outages or disruptions. This can provide you with peace of mind and ensure that your home remains powered even during emergencies or natural disasters.
  4. Easy Installation: Blue Pacific Solar Kits are designed with DIY enthusiasts in mind. They typically come with detailed instructions and all the necessary components, making the installation process relatively straightforward. With some basic electrical knowledge and the right tools, you can set up your solar system and start enjoying its benefits in no time.
  5. Long-Term Investment: Investing in a Blue Pacific Solar Kit is a smart long-term investment for your home. Solar panels have a long lifespan, often lasting 25 years or more with proper maintenance. Additionally, many jurisdictions offer incentives, such as tax credits or rebates, to encourage solar adoption. These financial benefits, combined with the potential for reduced energy costs, make solar power a financially attractive option for homeowners.

Please note that specific features and benefits may vary depending on the exact Blue Pacific Solar Kit model and your location. It’s always a good idea to research and consult with professionals to determine the best solar solution for your specific needs and circumstances.

Introduction:

In today’s world, where electricity is an essential part of our daily lives, power outages can be a major inconvenience. Whether you’re living off-grid or looking for a backup power solution, having a reliable inverter charger is crucial. One such versatile and powerful option is the Midnight 48-volt DIY Inverter Charger. In this blog post, we’ll explore the features and benefits of this innovative device and how it can empower you to achieve power independence.

  1. Understanding the Midnight 48-Volt DIY Inverter Charger:

The Midnight 48-volt DIY Inverter Charger is a cutting-edge power solution that combines the functions of an inverter and a battery charger into a single unit. With a 48-volt DC input, this device converts stored energy from batteries into usable AC power, allowing you to run household appliances, tools, and other devices during power outages or when living off-grid.

  1. Power Efficiency and Performance:

One of the standout features of the Midnight 48-volt DIY Inverter Charger is its exceptional power efficiency and performance. It utilizes advanced power conversion technology, ensuring minimal energy loss during the conversion process. This not only maximizes the runtime of your battery bank but also reduces the overall energy consumption, making it an eco-friendly choice.

  1. Seamless Integration:

The Midnight 48-volt DIY Inverter Charger seamlessly integrates with various renewable energy sources such as solar panels, wind turbines, or hydroelectric generators. By connecting these energy sources to the inverter charger, you can harness clean and sustainable energy to power your home or off-grid setup. This integration empowers you to reduce your carbon footprint while enjoying uninterrupted power supply.

  1. Versatility and Customization:

The Midnight 48-volt DIY Inverter Charger offers versatility and customization options to cater to individual power requirements. It provides multiple AC outlets to connect a range of devices simultaneously, ensuring convenience and flexibility. Moreover, the inverter charger can be configured to meet specific voltage and frequency needs, making it compatible with diverse electrical systems.

  1. Intelligent Battery Management:

To optimize the lifespan and performance of your battery bank, the Midnight 48-volt DIY Inverter Charger incorporates intelligent battery management features. It employs advanced charging algorithms to ensure efficient and safe charging, preventing overcharging or undercharging. Additionally, it provides comprehensive battery monitoring, giving you real-time information about the battery’s state of charge and health.

  1. User-Friendly Interface:

The user-friendly interface of the Midnight 48-volt DIY Inverter Charger simplifies operation and monitoring. The intuitive LCD screen displays vital information such as battery voltage, output power, and system status. It also allows you to adjust settings and customize parameters with ease.

  1. Safety and Protection:

When it comes to electrical devices, safety is paramount. The Midnight 48-volt DIY Inverter Charger incorporates a range of safety features to protect both the device and connected devices. It includes built-in surge protection, short circuit protection, and over-temperature protection, ensuring a safe and reliable power supply.

Conclusion:

The Midnight 48-volt DIY Inverter Charger offers a robust and efficient power solution for those seeking independence from the grid or requiring backup power during outages. With its power efficiency, seamless integration with renewable energy sources, versatility, and intelligent battery management, this device empowers you to take control of your power needs. Experience the freedom of uninterrupted power supply and embark on your journey towards sustainable living with the Midnight 48-volt DIY Inverter Charger.

Regenerate response

Sol-Ark 10 kW Hybrid Inverter: Empowering Solar Energy Independence

Hybrid Sol-Ark Pre Engineered Systems for DIY
Sol-Ark

High Quality

Great Service

In the quest for energy independence and sustainability, solar power has emerged as a popular choice for homeowners and businesses alike. And at the heart of any effective solar system is the inverter, responsible for converting the sun’s energy into usable electricity. Among the many options available in the market, the Sol-Ark 10 kW Hybrid Inverter stands out as a powerful and versatile solution that empowers solar energy users to take control of their power generation and consumption.

The Sol-Ark 10 kW Hybrid Inverter is a cutting-edge technology that combines the functionalities of a solar inverter, battery charger, and backup power source in a single unit. With its advanced design, this inverter can efficiently harness the DC power generated by solar panels, converting it into AC power suitable for use in homes or businesses. The integration of battery charging capabilities allows users to store excess solar energy for later use, optimizing energy consumption and reducing reliance on the grid.

One of the standout features of the Sol-Ark 10 kW Hybrid Inverter is its ability to seamlessly switch between grid-tied and off-grid operation. In grid-tied mode, the inverter synchronizes with the utility grid, allowing users to sell excess solar power back to the grid and earn credits. This feature not only reduces electricity bills but also enables homeowners to become active participants in the renewable energy ecosystem. In off-grid mode, the inverter operates independently, providing uninterrupted power supply even during grid outages or in remote locations where access to the grid is limited. This backup power capability is invaluable for maintaining essential electrical appliances and ensuring comfort and security during emergencies.

The Sol-Ark 10 kW Hybrid Inverter also offers advanced monitoring and control features. With its user-friendly interface and integrated Wi-Fi connectivity, users can remotely monitor and manage their solar energy system through a dedicated smartphone app or web portal. Real-time data on energy production, consumption, and battery status empower users to make informed decisions about their energy usage, maximize self-consumption, and optimize overall system performance.

Another notable aspect of the Sol-Ark 10 kW Hybrid Inverter is its scalability. The system allows for easy expansion, enabling users to add more solar panels and batteries as their energy needs grow. This flexibility ensures that the inverter can adapt to changing energy requirements, making it a long-term investment that can evolve with the user’s needs.

Furthermore, the Sol-Ark 10 kW Hybrid Inverter is built to withstand harsh environmental conditions. Its robust construction and high-quality components make it durable and reliable, capable of withstanding extreme temperatures and inclement weather. This resilience ensures consistent performance and minimizes maintenance requirements, providing peace of mind to solar energy system owners.

In conclusion, the Sol-Ark 10 kW Hybrid Inverter is a feature-rich and versatile solution that empowers solar energy users to achieve energy independence and maximize the benefits of their solar installations. Its combination of solar inverter, battery charger, and backup power capabilities, along with advanced monitoring and scalability, sets it apart as a comprehensive solution for both residential and commercial applications. By harnessing the power of the sun and leveraging innovative technology, the Sol-Ark 10 kW Hybrid Inverter paves the way for a more sustainable and self-reliant future.

Solar Energy

Solar energy is a type of energy that is generated by the sun. It is harnessed using a range of technologies such as solar power to generate electricity, solar thermal energy (including solar water heating), and solar architecture. The total amount of solar energy incident on Earth is vastly more than the world’s current and anticipated energy requirements.

Solar power is generated by using photovoltaic (PV) cells in solar panels. When the sun shines onto a solar panel, energy from the sunlight is absorbed by the PV cells in the panel. This energy is then converted into electricity that can be used to power homes and businesses.

Solar thermal energy is used to heat water or air for use in homes and businesses. This technology uses mirrors or lenses to concentrate sunlight onto a small area, which heats up a fluid that is then used to generate steam. Steam can be used to drive turbines that generate electricity or to heat water for use in homes and businesses.

Solar architecture refers to the design of buildings that are optimized for capturing sunlight and using it for heating and lighting purposes. This can include features such as large windows that allow sunlight to enter the building, as well as materials that are designed to absorb and store heat from the sun.

The advantages of solar energy are numerous. It is a renewable source of energy that does not produce any greenhouse gas emissions or other pollutants. It is also abundant and widely available, making it an attractive option for countries that are looking to reduce their dependence on fossil fuels.

In conclusion, solar energy is an important source of renewable energy that has many applications in our daily lives. From generating electricity to heating water and buildings, solar energy has the potential to revolutionize the way we live our lives. As we continue to develop modern technologies for harnessing this abundant source of energy, we can look forward to a future that is powered by clean, sustainable solar power.

How to wire solar batteries BluePacificSolar

Solar batteries are devices that store excess solar energy from your solar panels and allow you to use it later when the sun is not shining. Wiring solar batteries correctly is essential for the safety and performance of your solar system. Here are some steps to wire solar batteries from BluePacificSolar:

  1. Choose the right type and size of solar batteries for your system. BluePacificSolar offers different types of batteries, such as lead-acid, lithium-ion, and Gel. Each type has its own advantages and disadvantages, such as cost, lifespan, efficiency, and maintenance. You also need to consider the capacity and voltage of your batteries, which depend on your energy needs and the size of your solar panel array.
  2. Connect your solar batteries in series or parallel, depending on your desired output voltage and current. Series connection means connecting the positive terminal of one battery to the negative terminal of another battery, and so on. This increases the voltage but keeps the current constant. Parallel connection means connecting the positive terminals of all batteries together and the negative terminals of all batteries together. This increases the current but keeps the voltage constant.
  3. Use appropriate cables, connectors, fuses, and circuit breakers to connect your solar batteries to your charge controller, inverter, and other components of your solar system. Make sure to follow the wiring diagram and instructions provided by BluePacificSolar for your specific battery model and system configuration. Use caution when handling live wires and wear protective gloves and goggles.
  4. Secure your solar batteries in a safe and ventilated location, away from direct sunlight, heat sources, flammable materials, and children or pets. You can use battery boxes or racks to mount your batteries on a wall or floor. Make sure to leave some space between the batteries for air circulation and easy access.
  5. Monitor and maintain your solar batteries regularly to ensure their optimal performance and longevity. You can use a battery monitor or meter to check the voltage, current, state of charge, and temperature of your batteries. You can also use a hydrometer to check the specific gravity of the electrolyte in lead-acid batteries. Follow the manufacturer’s recommendations for charging, discharging, equalizing, and cleaning your solar batteries.

Solar Commissioning Guide

Solar commissioning guide

Solar commissioning is the process of verifying that a solar photovoltaic (PV) system is installed correctly and operates as intended. Solar commissioning is an important step to ensure the safety, performance and reliability of a solar PV system. Solar commissioning should be performed by a qualified professional who has the appropriate training, experience and equipment to conduct the necessary tests and inspections.

The solar commissioning process typically involves the following steps:

  • Pre-commissioning: This is the preparation phase before the actual commissioning takes place. It includes checking the design documents, permits, contracts, warranties and manuals of the solar PV system. It also involves inspecting the site conditions, equipment delivery and installation quality. Pre-commissioning helps to identify and resolve any issues or discrepancies before they affect the commissioning process.
  • Functional testing: This is the phase where the solar PV system is tested for its functionality and performance. It includes verifying the electrical connections, grounding, polarity, voltage, current, power and energy output of the solar PV system. It also involves testing the protection devices, inverters, meters, monitoring systems and other components of the solar PV system. Functional testing helps to ensure that the solar PV system meets the design specifications and operates safely and efficiently.
  • Documentation: This is the phase where the results and records of the commissioning process are documented and reported. It includes preparing and submitting a commissioning report that summarizes the findings and recommendations of the commissioning process. It also involves updating and archiving the as-built drawings, manuals, warranties and other documents of the solar PV system. Documentation helps to provide evidence of compliance and quality assurance for the solar PV system.

Solar commissioning is a vital part of any solar PV project. It helps to ensure that the solar PV system is installed correctly and operates as intended. Solar commissioning also helps to protect the investment and reputation of the project owner, installer and manufacturer.

The History of Solar

Hello, fellow sun-lovers! Today I’m going to tell you a little bit about the history of solar energy, the most awesome and eco-friendly way to power your home, your car, and your life.

Solar energy is not a new invention. In fact, humans have been using the sun’s rays for thousands of years. The ancient Egyptians, Greeks, and Romans used solar architecture to design their buildings and temples. They used clever techniques like windows, mirrors, and skylights to maximize the natural light and heat from the sun. They also worshipped the sun as a god, which shows how much they appreciated its power and beauty.

The first modern solar device was invented in 1767 by a Swiss scientist named Horace de Saussure. He created a solar oven, which was basically a box with a glass lid that could cook food using the sun’s heat. He reached temperatures of up to 230°F (110°C), which is pretty impressive for a simple box. He also discovered that black surfaces absorb more heat than white ones, which is why most solar panels today are black.

The next major breakthrough in solar history came in 1839, when a French physicist named Edmond Becquerel discovered the photovoltaic effect. This is the process by which light can generate electricity in certain materials. He used two metal electrodes in a solution of silver chloride and exposed them to sunlight. He noticed that the electric current increased when the light was stronger. This was the first step towards creating solar cells, which are the building blocks of solar panels.

The first solar cell was made in 1883 by an American inventor named Charles Fritts. He used selenium, a metalloid element that can conduct electricity when exposed to light. He coated a thin layer of selenium with gold and attached wires to it. He managed to produce a very small amount of electricity, about 1% of what modern solar cells can do. But it was still a remarkable achievement for its time.

The solar industry really took off in the 1950s, when three scientists at Bell Labs in New Jersey created the first practical silicon solar cell. They used a technique called doping, which involves adding impurities to pure silicon to create positive and negative charges. When sunlight hits the silicon, it knocks off electrons from the atoms and creates an electric current. The silicon solar cell had an efficiency of about 6%, which was much higher than previous attempts.

Since then, solar technology has improved dramatically, thanks to innovations in materials, design, and manufacturing. Today, we have solar panels that can reach efficiencies of over 20%, and some experimental ones that can go up to 40%. We also have solar farms that can generate enough electricity to power entire cities, and solar satellites that can beam energy from space. We have solar cars that can race across continents, and solar planes that can fly around the world. We have solar gadgets that can charge our phones, laptops, and watches. And we have solar dreams that can inspire us to create a cleaner and brighter future.

That’s all for today’s history lesson. I hope you enjoyed it and learned something new. Remember to stay sunny and keep shining! ☀️

Do you own solar system by yourself

If you want to install a home solar system by yourself, you will need to follow some steps and have some basic tools and materials. Here are some tips to help you get started with more details:

  • First, you need to determine how much solar power you need for your home. You can use online calculators or consult a professional to estimate your energy consumption and the size of the solar system you need. You also need to check the local regulations and permits for installing a solar system in your area. Some factors that affect your energy consumption are the number and type of appliances you use, the hours of sunlight you receive, the climate and season, etc. Some factors that affect the size of the solar system you need are the wattage and efficiency of the solar panels, the space and orientation available for mounting them, the battery capacity and voltage, etc. You should also consider your budget and the payback period of your investment.
  • Second, you need to choose the type and location of your solar panels. There are different types of solar panels, such as monocrystalline, polycrystalline, thin-film, etc., each with its own advantages and disadvantages. Monocrystalline panels are more efficient and durable, but also more expensive and sensitive to shading. Polycrystalline panels are cheaper and more resistant to high temperatures, but also less efficient and uniform. Thin-film panels are flexible and lightweight, but also less efficient and durable. You also need to decide where to mount your panels, either on the roof or on the ground, depending on the space and orientation available. You should choose a location that receives maximum sunlight throughout the year and has minimal shading or obstructions. You should also take into account the angle and direction of your roof or ground, as well as the wind load and snow load that may affect your panels.
  • Third, you need to install the solar panels and connect them to the rest of the system. You will need some tools and materials, such as a drill, a level, a tape measure, screws, brackets, wires, connectors, etc. You should follow the instructions provided by the manufacturer or supplier of your solar panels and make sure they are securely attached and aligned. You also need to connect the panels to an inverter, which converts the direct current (DC) produced by the panels into alternating current (AC) that can be used by your appliances. You may also need a battery bank and a charge controller if you want to store excess energy for later use or for backup power. A battery bank consists of several batteries connected in series or parallel to provide a certain voltage and capacity. A charge controller regulates the flow of electricity between the solar panels, the battery bank, and the inverter, to prevent overcharging or overdischarging.
  • Fourth, you need to test and monitor your solar system. You should check if everything is working properly and safely before turning on your main power switch. You should also keep track of your energy production and consumption using a meter or an app. You should also perform regular maintenance and cleaning of your solar panels and components to ensure their efficiency and longevity. Some maintenance tasks include checking for cracks or damages on the panels, tightening loose connections or screws, replacing worn-out parts or batteries, clearing dust or debris from the panels or vents, etc.

Installing a home solar system by yourself can be a rewarding and cost-effective project, but it also requires some skills and knowledge. You should do your research and planning before starting and consult a professional if you encounter any problems or doubts. You should also follow the safety precautions and regulations when working with electricity and solar equipment.

Solar Edge StoreEdge Battery System

Solar Edge StoreEdge Systems are a smart solution for homeowners who want to increase their energy independence and save on electricity bills. StoreEdge Systems offer:

  • Solar Edge’s breakthrough solar inverter technology that optimizes the power output of each solar panel and reduces power losses
  • Leading battery storage systems that store excess solar energy for use when needed, day or night, and provide backup power in case of grid interruption
  • Higher energy production by allowing up to 200% DC oversizing and mitigating the effects of shading, soiling, aging, and panel mismatch
  • Advanced safety by automatically reducing the solar array and battery voltage to touch-safe levels upon AC shut down
  • Module-level visibility through Solar Edge’s monitoring platform that tracks battery status, solar production, and self-consumption data

With StoreEdge Systems, homeowners can lower their electricity bills by using battery storage to help power the home and purchase less or cheaper electricity from the grid. They can also increase their energy independence by reducing their grid reliance and protecting themselves from rising electricity costs and grid outages.

MidNight Solar DIY Kits

If you are looking for a way to power your off-grid cabin or house with renewable energy, you might want to check out the midnight solar DIY kits. These kits include a powerful inverter/charger that can handle up to 5000W of continuous output and 7000W of surge power.

The inverter/charger also has a built-in MPPT charge controller that can harvest up to 5000W of solar power from your panels. The best part is that you can install and program the kit yourself, saving you time and money on hiring professionals. The midnight solar DIY kits are compatible with most battery types, including lead acid and lithium. You can also monitor and adjust your system settings from the inverter’s graphics panel or from your smartphone.

The midnight solar DIY kits are designed and assembled in America and come with a one-year warranty and excellent customer support. Whether you want to go green, save money, or have backup power in case of emergencies, the midnight solar DIY kits are a great option for your off-grid needs.